Tuesday, September 4, 2012

My Old House: The Sun Porch


Well the house is officially broken in. Over the holiday weekend I set off the fire alarm for the first time making burgers. Jeremy said I made the case for my high powered vent hood when we remodel the kitchen. While the house was airing out via a box fan, we retreated to the sun porch.  The sun porch is the only room that's close to done. Don't get me wrong, there's still twenty things that would make great improvements, but it's clean, functional, and looks pretty good.

I really wish I had a "before" picture of our sun porch. It wasn't horrible or anything, but the light fixture was dim and corroded and the door had 5 gazillion coats of paint smeared all over the glass panes. You'll have to settle for a "during" shot. Jeremy had just finished installing the new fan at this point and the porch was full of baseboard scraps, gardening supplies, and plants killed during the move. The sad twig hanging from the Topsy Turvy used to be a tomato plant.

And after:


This is one of the glass panes on the door after some serious time with a razor blade and some Windex. The door was so dirty that my camera treated it like an opaque object in the before photo. In the after photo I had to retrain the focus on the door because it wanted to focus on the floor inside. What a concept! Glass that is CLEAR! Here's the door knob of the same door after 20 minutes of polishing with Brasso and a little more razor work.
The other big change was the electrical items. The damp-rated fan is new and provides a lot more light and we added an outdoor electrical outlet. I love the outdoor outlet because now we can plug in an Ipod dock outside and listen to music on the porch and in the front yard. If this becomes even more of a dining space down the road, we can also plug in a blender, electric kettle, etc. And it's great for a vacuum cleaner too.

We were really nervous about this outdoor outlet because we had to drill through brick. It did take a hammer drill and a drill bit roughly the size of a harpoon, but the install was relatively painless and took about 2 hours to do. I still need to paint the dark gray duct seal around the outlet to make it look a little more streamlined.

I also want to build a legitimate corner shelf for my Meyer lemon tree and replace the screen, which has holes and paint smears. I'm also contemplating a built-in bench or a bistro set more scaled to the small space. The porch is a little over 7' by 10'.  I think a bench and low tables that do double duty as footstools would be neat. Something like the first photo on this blog but with a more seaside cottage look. For now, it's still a great space to enjoy the long summers and mild falls we have here in Atlanta.


Monday, August 20, 2012

Banana Waffles

Last week Jeremy finished wiring the first new circuit for the house. We turned the formal dining room into an office and went from having 2 outlets (1 of which was 2 prong and ungrounded) to 7 properly wired outlets. We took down the chandelier and replaced it with a ceiling fan. The circuit also incorporates our small screened-in sun porch, where we added an outdoor ceiling fan and an outdoor outlet.

Writing this all down, I realize it sounds like a lot of work and it was. But the thing that caused 3 meltdowns and a chocolate binge wasn't wiring the fans or drilling through the brick veneer for the outdoor outlet. Oh no, those were a cakewalk in comparison. Two little words caused more renovation headaches than pulling the poison ivy in our 1/2 acre yard and those words are: DRYWALL PATCHES. Maybe it's because we have plaster layered over the drywall so none of the regular patching kits work. Or maybe it's because I'm allergic to the blown-in fiberglass insulation that kept falling on my head. Could be because ceiling patches require the skills of a contortionist and MacGyver combined. Whatever the particular reason, I was reduced to a raving mental patient on several occasions. Do you know what helps calm a raving lunatic? These waffles.
Seriously. Because on a day when I wake up knowing that I'm going to have to cut drywall in the shape of a giant squid, magically attach it to the crumbly plaster ceiling while doing a backbend, and spackle and sand it at least 3 times to try and match the surrounding texture, while I gradually grow itchier, the last thing I want to worry about is breakfast.

A few of these straight from the freezer into the toaster oven and a few minutes later you have breakfast nirvana. You won't even notice there's some healthy ingredients like whole wheat flour, flax, and almond milk snuck into this recipe. All you will taste is toasty banana with a hint of vanilla. I like to wait until I have some overripe bananas with at least a few black speckles. For this batch I used some overripe bananas I had frozen. I usually use 3 large bananas but there is definitely some wiggle room in the amount of banana. You can also play around with the oil content. I tend to like 2 tablespoons rather than the full 1/4 cup called for in the original recipe because I find the waffles come out crispier. I tried eliminating the fat completely, but they came out with a less fluffy texture and too dry.

The yield on this varies depending on the size of your waffle maker. I make undersized Belgian waffles and get 16 to 20. I'd guess this would feed about 6-8 people. Maybe more if you get crazy with the toppings.
I've also made this recipe once using Bob's Red Mill gluten-free baking mix. I wasn't crazy about the mix. It had an earthy, sort of wheat grass taste. The next time I make these for celiac guests, I'll try King Arthur's version, which I've seen great results with in other baked goods. If your bananas are not overripe and you won't be smothering these with syrup, you may want to add some additional sweetener.

Banana Waffles
Adapted from this recipe on food.com
Serves 6-8
Cooking Time: 45 minutes

Ingredients

1 1/2 cups white flour
1 1/2 cups wheat flour
2 tablespoons flax meal
1 tablespoon baking powder
1 teaspoon salt

2 teaspoons vanilla
2 tablespoons oil (I like to use melted coconut oil and melted butter will also work.)
3 large overripe bananas, mashed with a fork (leave them fairly chunky or they'll add too much moisture to the batter)
3 cups unsweetened vanilla almond milk (Or whatever milk you want. I've been meaning to try it with low fat coconut milk. Please report back if you try this!)

Directions

1. In a large bowl stir together all the dry ingredients.

2. Measure all the wet ingredients into the same bowl and stir until just combined.

3. Let the batter rest for 5-10 minutes. This will create a fluffier waffle with a better texture.

4. Pour batter into your waffle maker per the manufacturer instructions and cook to your preferred level of golden-brown. For the mini Belgians you see above I used a generous 1/4 cup for each waffle and cooked them on the highest setting on my Waring waffle maker.

5. Allow leftover waffles to cool and freeze in a freezer bag. If your waffles are on the mushier side you may want to freeze on a cookie sheet and then transfer to a bag or freeze with wax paper in between waffles, otherwise they'll be hard to separate out of the freezer. 

6. Reheat frozen waffles in a 325 degree oven for 5 minutes or more. Check them every couple of minutes and flip or rotate if they start to brown too much.

Update 4/5/13:

I made these again a few weeks ago and was really surprised when they came out of the waffle iron and were still mushy and uncooked on the inside. After a second failed attempt, I realized what I was doing wrong. I was confronted with a really lumpy batter and decided to treat it like pancake batter and puree it with my immersion blender. Big mistake! The pureed bananas added too much moisture to the batter so that even on the highest iron setting, they were mush in the middle. Plus the banana flavor was less noticeable since there weren't any caramelized chunks as in previous batches. Leave the bananas fairly chunky. If you want a really smooth batter puree first and then fold in the bananas.


Sunday, July 29, 2012

My Old House: A Damp, Moldy Basement

This is what the basement looked like when we moved in. That half wall in the background holds back some good old Georgian red clay soil. We think the basement was originally dirt and when they finished it they simply compacted some of the soil on the below grade front wall and slapped up that retaining wall. You can see it's not in such hot shape. The pink and gray smears on it are efflorescence from rain water soaking into the soil and evaporating through the concrete. In another part of the basement there was also a GE refrigerator older than time that had condensation all over it.

The other problem was that 20 minutes of doing laundry down there was enough to send me for my rescue inhaler. You see, I'm a human mold detector; I'm severely allergic. For about 2 weeks Jeremy and I wore respirators every time we went into the basement. Big surprise that the humidity was close to 80% down there and there was mold growing on the dirt and the walls.

And here's what it looks like after a few improvements:
The first order of business was to get the humidity down to a reasonable level. I recycled the refrigerator through Georgia Power's Earth Cents program, which is totally awesome. They pick up your old energy-guzzling second refrigerator for free and mail you a rebate check. It was $35 when I did it, but for a limited time it looks like they're offering $50. They also have all kinds of other energy rebates. (Eventually, we plan to take advantage of some for programmable thermostats and energy efficient freezers.)

I also replaced an old dial-operated dehumidifier with this baby. So far it has done awesome. You can see it has the humidity down to 50% and it takes less than a day to return the basement to that level even after heavy rain. We also bought some tubing and hooked it up to the a/c pump so we don't have to empty the water manually; it's emptied through the same channel as the a/c condensation. The only downside is that with all the rain we've been having lately it ran almost continuously the month we installed it, adding about $50 to our electric bill. Ah well, it's a small price to pay to be able to breathe.

Then we cleaned the mold off the walls. Contrary to popular belief, you do NOT need bleach to do this. Bleach only kills a couple of varieties of mold on non-porous surfaces only. So, while it may be fine for a bathtub or sink it won't do jack on concrete or wood. Correcting the moisture problem and then cleaning up with soapy water (while wearing appropriate mold protection) does just as well, without the possibility of you passing out from the fumes.

Jeremy breaking out the debris in a settlement crack.

Then it was time to make the below grade wall water resistant. This is still an ongoing process. First we patched up 3 big settlement cracks in the foundation and retaining wall. We used hydraulic cement since there is sometimes water penetration in this area, but also because it sets up in minutes and doesn't need to be cured in any special way.

I found out minutes actually means about 30 seconds once you get the cement to the right consistency, which is sort of like soft cookie dough. Once it's to that point you can roll it into a ball and really smoosh it into the crack. The water/cement ratio on the package was pretty useless though, especially after a couple of batches have made the provided scoop all gunky. I also highly recommend wearing normally-I-wouldn't-be-caught-dead-wearing-these clothes. A dust mask and gloves are also required.

The proper "cookie dough" consistency.
Smooshing the hydraulic cement into the crack.
After the cracks were patched we had to deal with the retaining wall itself. Eventually I would like to pour a cement slab over it and completely seal off the dirt from the basement, but a cement slab needs support and a level surface. I didn't want to deal with drilling into the granite walls or the pricetag associated with such a big project.

So we decided to use a paint-on waterproofer on the wall and a vapor barrier over the dirt to keep mold from growing and water from evaporating into the basement air. Unfortunately, the dirt was not level and once we started digging we found out that portions of the dirt had been directly cemented over. That's actually a cement surface I'm sitting on to patch the wall. We decided the best thing to do was to build a smaller wall, perpendicular to the retaining wall to separate the dirt and concrete portions. That way we could level the dirt:
We simply hammered a few stakes in near the division and wrapped a piece of plywood in 6 mm plastic to form the wall. Then we shoveled and raked the dirt until it was level and all the mold had been turned under.

The bad part of using waterproofer is prepping the surface. For waterproofer to adhere well you have to remove as much grime and water deposits as possible from the surface your going to paint. Jeremy and I scrubbed the wall and then used masonry etcher, which is similar to muriatic acid and will eat through galvanized metals, to get rid of the deposits. The kicker is you have to flush it off the wall once it's done working, which bumped the humidity up substantially. We tried to move quick and vacuumed up the water with our shop vac.

I touched up the existing waterproofer on the foundation wall and added it to the retaining wall. The waterproofer itself is not that bad if you go with a latex base, which are a lot less smelly than oil bases and have fewer volatile organic compounds too. The waterproofer is really thick so it has to be mixed repeatedly throughout the painting process. It also has to be worked into pores and cracks, so I hand brushed the whole wall, twice.
We still have some water seepage, but the air in the basement is breathable now. In a few weeks, I'll add the vapor barrier, after Jeremy has finished rewiring. Otherwise he would just rip it up trying to get to the outside edge of the foundation wall.

All of the basement mold and moisture problems stem from the fact that way too much water makes it close to the foundation because our lot slopes toward the house. But I am a woman with a plan! Stay tuned for more on correcting drainage issues.

Friday, July 6, 2012

Smoked Corn Chowder

I'm sorry. Renovations have eaten my life. I've learned more about hydraulic cement, masonry, and drainage than I ever cared to know. More on that later.
Today, I wanted to share an awesome recipe that makes use of the bountiful amount of corn available this time of year. The best way to make this recipe is to smoke the corn on the grill before you make the soup. But if you don't want to go through the trouble, you can just cook the corn with the soup. It's really good with regular corn, but smoking the corn puts this soup in my top 3 favorite soups.

This is a thick, hearty chowder. Meaning it's thickened with flour and cream. If you want to lighten it up you could sub half and half or milk for the cream and use a more waist-friendly thickener like arrowroot. It doesn't take too long to make, freezes and reheats really well, and basically tastes like grilled summer in a bowl. 
If you decide to grill the corn. Shuck the corn so that only 1 layer of husk remains to protect the kernels from blackening too much. Then soak the corn in the sink for a few minutes before putting them on the grill. I like to put them on the cooler outer edge of the grill, so they take longer to cook and absorb more of the smoky flavor. For the wood chips, we've used hickory and mesquite successfully, but anything would probably be good.

There are lots of ways to test whether the corn is done. Being a visual person, I judge by color. Corn turns a slightly more golden version of it's original color when it's cooked. The husk should also be pretty brown and wilted and charred around the edge if you cook them low and slow.  I prefer a couple of blackened spots to half raw corn.
Since I am enormous klutz, I stink at cutting corn off the cob. When I try, it ends badly. I curse like a sailor and corn ends up on the ceiling. I usually call in my husband to do the dirty work and he claims all it takes is a very sharp a knife and a stable cutting surface. 
There's really not too many ingredients to this recipe either: a few pantry staples, corn, onion, potato, and fresh thyme and you're ready to go.
Smoked Corn Chowder
Serves 6-8
Cooking Time: Approx. 55 minutes (excluding smoking the corn)

Ingredients
  • 2 tablespoons butter
  • 1 tablespoon olive oil
  • 1 onion, diced
  • 2 garlic cloves, minced
  • 6 sprigs fresh thyme
  • 1/4 cup flour
  • 6 cups chicken or vegetable stock
  • 2 cups heavy cream
  • 2 Idaho potatoes, peeled and diced
  • 6 ears corn, smoked on the grill
  • Salt and freshly ground black pepper
  • chopped fresh parsley leaves, for garnish
Directions

1. Ahead of time, smoke the corn as described above or just use raw ears. Using a sharp knife cut off the whole kernels and set kernels aside.

2. In a large pot, melt the butter and olive oil together over medium heat. Add the onions and thyme and saute about 5 to 10 minutes until the onions are softened.

3. Add the garlic and saute 1 more minute.

4. Add the flour and stir to combine.

5. Add the vegetable stock, cream, and potatoes and bring to a hard boil. Boil for 7 minutes. (This step helps break down the potatoes so they'll give the soup a good texture.)

6.  Reduce the heat to a simmer. At this point, you can fish out the sprigs of thyme with a pair of tongs. The boiling will have removed most of the leaves and you can scrape off any leaves still clinging to the stem into the soup.

7. Season to taste with salt and pepper and add the corn kernels. Simmer for 10-12 minutes if using raw corn and a few minutes less if using smoked.

8. Ladle into bowls and garnish with parsley.
 

Tuesday, June 5, 2012

A New Project...My Old House

I know I fell off the face of the planet the last month and this is what is to blame...
This is a 1941 Cape Cod that my husband and I just purchased on May 11th near Oakhurst village in Atlanta. It's literally a retreat in the city.

We adore the place and all it eccentricities. It has all the hallmarks of a crazy old house. Three types of wiring. Check. Cast iron sewer pipes. Check. Creepy unfinished basement with breakneck stairs. Check. Yard that resembles a jungle, piano strip oak flooring hidden under carpet glue, teeny galley kitchen, and lots of lead paint. Check, check, check, and double check.

What it lacks in modernization it makes up for in structure, yard size, and location. The main floor is about 1300 square feet with 2 bedrooms and 1 and 1/2 baths. And it has a screened in sun porch! There is a finished attic with a low ceiling that we may turn into a full second story down the road. The attic has an additional room and full bath for a grand total of 3 beds, 2 1/2 baths. The house is also located on an old established street in Atlanta on almost a half acre.
And oh the yard! As an apartment dweller for most of my adult life, I can't get enough of the yard. We've already grilled twice in the few days we've been moved in. My dogs couldn't believe the space was all theirs! The lot has mature oaks over 70 feet tall, two mulberry trees, and the most fertile soil I have ever seen. Jeremy already has plans for a chicken coop and I'm deciding what type of composting system I want to use for the huge garden I have planned.
And the neighborhood! We're 2 miles from my husband's new office, .7 miles from the bars in Oakhurst village, 1 mile from Oakhurst Dog Park, and there are 2 coffee shops within a mile of us. We're also 1.7 miles from the nearest Marta train stop so out of town visitors can simply continue by train from the airport and get much closer to the house.

Anyhow, I plan on having My Old House as a regular feature on here. You can expect lots of before and after shots. Jeremy and I will be doing most of the renovations ourselves with the help of my super handy dad. I'll also give the nitty gritty on where we went to find supplies and the process so if you happen to have your own old house or live in the Atlanta area, you can take advantage of some of our sources.

Saturday, May 5, 2012

English Muffins

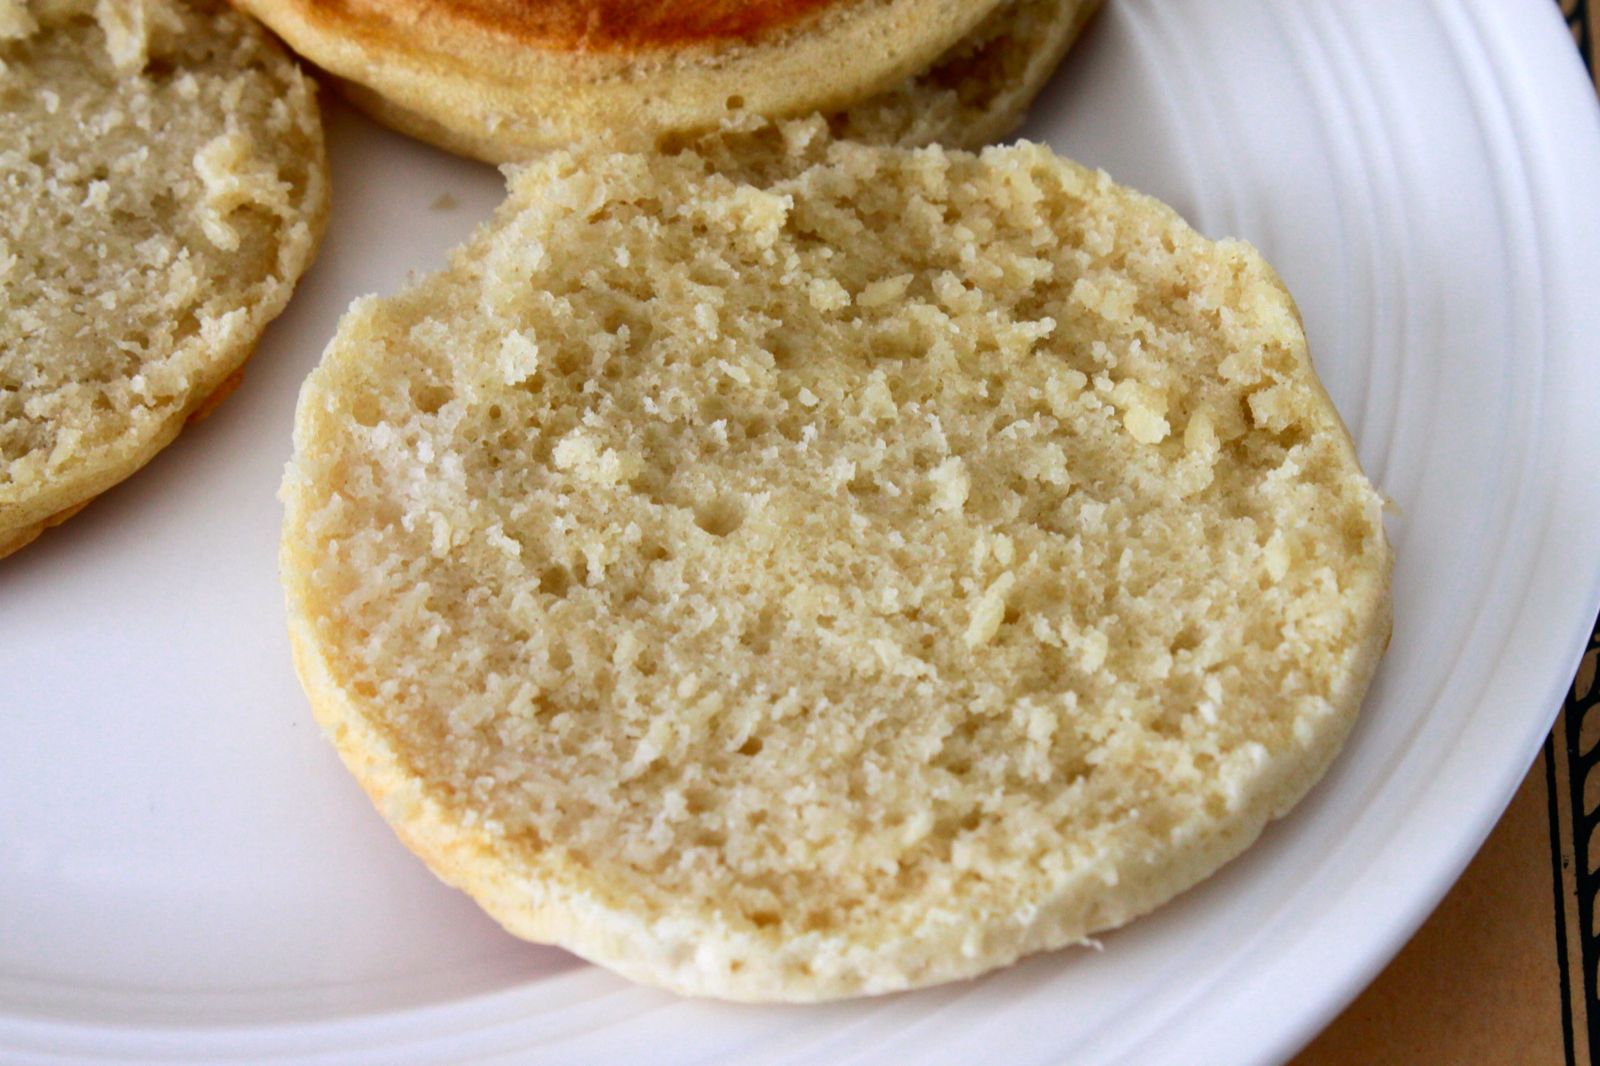
This is how I do breakfast. Runny fried egg--check. Thick cut slice of bacon--check. Homemade totally awesome English muffin--double check.

I love English muffins. They're a great vehicle for sweet or savory breakfasts. Unfortunately, the ones you get from the supermarket usually have one of three problems:

1. They're refrigerated and have weird moisture issues.

2. They're expensive. Seriously almost a $1 a piece for something that is almost completely made of flour and powdered milk? It's really bad if your whole family has a daily habit like mine.

3. They just plain suck.

This recipe is adapted slightly from Alton Brown's super popular recipe. My version makes a double batch (20 muffins or so) and has a better flavor due to a longer rise. They freeze and defrost really well so you can whip one out any time you have a craving for an egg sandwich. If you're intimated by yeast breads, this would be a great recipe to cut your teeth with. There's no kneading, punching down, or shaping of the dough. The dough is fairly liquidy and gets spooned into a form and cooked on a hot griddle. If you can handle pancakes, you won't find these much more difficult.

If you bake at all, you probably have most of what you need already. You'll also need powdered milk, a packet of yeast, and some kind of open circular form at least 3/4 inch deep. Alton recommends taking both ends off some tuna cans. Pancake rings would also work. And I use the rings from my canning jars. They're not the best choice because they're not very deep and tend to overflow, but they get the job done.

In separate bowls, you rehydrate the milk and the yeast.
If you've never worked with yeast before just know that a controlled temperature is your friend. This goes for both the water you use to rehydrate the yeast and the environment you let the dough rise in.

Stir the yeast into cool or luke warm water. Don't use hot water since a temperature of 140 degrees will instantly kill yeast. Let the yeast dissolve completely into the water. You shouldn't see any granules and it should look like a cloudy slurry. If you look closely there should be tiny bubbles on the surface of the yeast mixture, then you know it's alive.

The dough gets stirred together and put in a warm spot to rise. I like to preheat my oven to the lowest temperature and then shut it off while I'm mixing up the dough. That way I have an environment a bit warmer than room temperature for the yeast to multiply in. The dough should double in size during the rise. This will go faster or slower depending on the temperature. Here's a before and after:
Then I beat in a little baking soda, which creates even more bubbling action, helping make the characteristic nooks and crannies. Then I let the dough rest for several minutes while I prep the griddle.  I'm still playing around with the best way to maximize the nooks and crannies. You'll definitely have some, but I'll update this post once I've figured out the best way to get the full on sponge texture you get with commercial English muffins.
You could also make these in a skillet or frying pan. You'll want medium heat and a very light coating of oil. Make sure you spray your molds with a little oil too. You can play with the cooking time. At 300 degrees mine take 5 minutes on the first side and 4 on the second. If you find them browning too rapidly, turn down the heat. If you end up with gummy centers you can put them on a cookie sheet and finish them in the oven for a few minutes. A really nice touch is to dust the the griddle with cornmeal or semolina flour before you scoop out the muffins (in my rush to breakfast glory, I always forget to do this). I use a generous 1/4 cup to portion the dough.
Update 5/10/12: As is often the case with me, I have a new method born out of laziness. I mix up the dough the night before, cover the bowl in plastic wrap, and stick it in the refrigerator. The next day I preheat my oven to the lowest setting and shut it off. I take out the dough, beat in the remaining 2 teaspoons of salt, and let it rise in the warm oven for 30 minutes. No baking soda is necessary with this method, you'll have a great yeast flavor and tons of nooks and crannies. Then proceed with the recipe as usual. If you don't have time for an overnight refrigerator rise, you'll still get better nooks and crannies if you let the dough rise again after you beat in the salt. With an additional rise I also found I had a slightly higher yield (23 muffins versus 20). I'm guessing due to the increase of gas and therefore the increase in volume of the dough. I also calculated the carbs for my dad who is a diabetic and there are approximately 20 in a muffin (assuming a yield of 23), this could vary quite a bit depending on the weight of your flour though.   


English Muffins
Adapted from Alton Brown via She Simmers
Yields approx. 20 muffins
Cooking time: 2 hours 15 minutes (45 active)

Ingredients

Mixture #1:
72 grams (1 cup) nonfat milk powder
16 fl. oz. (2 cups) hot water
28 grams (2 tablespoons) sugar
4 grams (2 teaspoons) salt
28 grams (2 tablespoons) melted shortening or vegetable oil (Use something flavorless.)

Mixture #2:
7 grams (1 envelope) dry yeast
A pinch of sugar
5.4 fl. oz. (2/3 cup) lukewarm water

500 grams (4 cups) all-purpose flour
4 grams (2 teaspoons) salt

2 teaspoons baking soda
vegetable oil

Directions

1. Preheat your oven to the lowest temperature and when it's ready shut it off and leave the door closed.

2. In a large bowl stir together the powdered milk and hot water. Then add the rest of the ingredients in Mixture #1.

3. In a small bowl stir together Mixture #2 and let it sit a few minutes until the yeast is dissolved.

4. Make sure the milk mixture has cooled to lukewarm and add the yeast mixture to the larger bowl and combine. Then beat in all the flour.

5. Put the bowl in the oven and let rise 75 to 90 minutes or until doubled in volume.***Or put the bowl in the fridge for an overnight rise. See update above.***

6. Remove from oven, beat in the remainder of the salt and the baking soda.  Let dough rest while you prep the griddle.

7. Preheat an electric griddle to 300 degrees or a frying pan over medium heat. Add molds and lightly spray everything with oil.

8. Scoop a generous 1/4 cup of dough into each mold and cook until golden brown, about 5 minutes. Flip with tongs and cook a few more minutes.

9. Pop the muffins out of the molds. Split with a fork and serve. Leftover muffins can be cooled and frozen in freezer bags. To reheat, just thaw in the microwave for a few seconds, split, and toast if you want.

Saturday, April 28, 2012

Potato and Leek Soup

I love leeks. They're a milder cousin of the onion. This is primarily a lighter potato soup, with the leeks singing backup, and a slight smoky flavor from some bacon. Even onion haters will probably enjoy this one.

With leeks you only eat the white and light green parts. The darker green leaves are usually too tough to eat, but they make excellent packaging for a bouquet garni, which is what this recipe calls for. Just save two of the bigger leaves, lay the whole seasonings in one leaf, put the other on top, and tie with string, like so:
Learn from Bridget Jones's Diary and don't use rubber bands or dyed string. If you plan a little better than me, you'll have cooking twine on hand. Otherwise some plain cotton string will do in a pinch. Seriously, tying the string is the hardest part of this recipe, then it's all smooth sailing. You saute a little bacon with butter until most of the fat renders, and go from there.
Emeril serves his soup with snipped chives, but I hate buying an extra ingredient just for a couple tablespoons of garnish. It's great with crackers and I could see going the loaded baked potato route and adding cheese, bacon, or green onion on top too. 
Potato and Leek Soup
Serves 6
Adapted slightly from Emeril Lagasse
Cooking Time: 60 minutes (30 active)

Ingredients

2 tablespoons butter
2 strips bacon, chopped

3 small leeks (about 1 pound)

2 bay leaves
20 black peppercorns
4 sprigs thyme

1/2 cup dry white wine
5 cups chicken stock
1 to 1 1/4 pounds russet potatoes, diced
salt, to taste (with low sodium stock you'll probably want 1 to 1 1/2 teaspoons)
1/4 teaspoon white pepper
1/2 cup heavy cream

Directions

1. Cut the dark green tops and roots off the leeks. Slice the edible part lengthwise and rinse thoroughly to get rid of any dirt, then slice thinly. Reserve two of the larger dark green leaves for a bouquet garni.

2. To make the bouquet garni, put the thyme, peppercorns, and bay leaves in one of the leaves, and put the other leaf on top. Tie with cooking twine.

3. In a large saucepan melt the butter and add the bacon. Saute for a few minutes until most of the fat has rendered from the bacon.

4. Add the leeks and saute until they're very soft, about 5 minutes.

5.  Add the wine and bring to a boil.

6. Add the bouquet garni, stock, potatoes, salt, and white pepper. Simmer for 30 minutes or until the potatoes are fully cooked and falling apart.

7.  Puree with an immersion blender.

8. Stir in the cream and serve!

Saturday, April 21, 2012

French Onion Soup

This past winter I got into soups in a big way. They're a great way to get more veggies into your diet, they make a great meal, and they freeze and reheat well. Since your consuming a good deal of water with the broth, you consume a lot less calories per volume than lots of other meals. This French onion recipe adapted from Julia Child is one of my favorites. It requires just a few ingredients, but it would impress the hell out of dinner guests and you can make it ahead of time too. It's got a deep rich onion and beef flavor and it's awesome with crusty bread broiled with cheese. This recipe takes a good chunk of time though, so I usually double the batch and freeze half for later.
Making good French onion soup requires full on caramelization of the onions. Basically you want to cook the onions first by letting them sit, covered at a low temperature, then you turn up the heat to start breaking down the sugars in the onions resulting in the brown goodness you see above. If you were to just fire up high heat straight off you'd get semi-raw onions with burnt edges. With proper caramelization you also don't need to add any food coloring. The soup will have the rich brown color from the onions and broth alone. It's crazy how much water cooks out of onions too. If you decide to do a double batch, use at least a 6 or 8 quart stockpot.
The enrichments are optional. I didn't use cognac simply because the only cognac I had was Grand Marnier! And I didn't add the grated raw onion because frankly slicing onions is bad enough, grating them just seems like punishment to my eyes. I did add Worcestershire though and I like the extra layer of flavor it adds.

French Onion Soup
Adapted from Mastering the Art of French Cooking via Smitten Kitchen
Serves 6
Cooking Time: 2 hours, 15 minutes (1 hour, 15 minutes active)

Ingredients

For the Soup:

1 3/4 lbs onions (794 grams), thinly sliced (This is another place where a mandoline slicer is handy.)
3 tablespoons (42 grams) unsalted butter
1 tablespoon (15 ml) olive oil
1 teaspoon (5 grams) salt
1/4 teaspoon (1 gram) granulated sugar
3 tablespoons (24 grams) flour
2 quarts (8 cups or 1.9 liters) beef stock or broth
1/2 cup (118 ml) dry white wine or dry white vermouth
black pepper, to taste

Optional Enrichments:

1 teaspoon or to taste, Worcestershire sauce
3 tablespoons (45 ml) cognac or brandy
1 tablespoon grated raw onion

For Serving:

slices of bread, toasted until hard, for serving (Baguette or French is traditional, but I really like sourdough too!)
Parmesan or swiss, for serving

Directions

1. Melt the butter and oil together in a large pot. Turn the heat to medium-low. Add the onions, stir to coat them, cover the pot, and let them sit for 15 minutes.

2. Uncover, turn the heat to medium, add the sugar and salt. Stir onions frequently for 30 to 40 minutes or until completely caramelized. 

3. Sprinkle the flour over the onions and cook for about 3 minutes.

4. Add the wine and stir. Add the broth a little at a time, stirring in between.

5. Add pepper and adjust salt if necessary. Err on the side of less salt since the cheese on top will add extra salt.

6. Bring to a simmer and simmer for 30 to 40 minutes.

7. Stir in the Worcestershire sauce, cognac, and raw onion, if using.

8. To serve preheat your oven to 325 degrees. Divide the soup among six bowls. Top with toasted bread, mound some cheese on top, and bake on a cookie sheet for 20 minutes. Deb over at Smitten Kitchen recommends a generous 1/4 cup of cheese per bowl if you like it gooey with cheese. I used less for the calorie savings. Finish under the broiler for a minute or two to brown the cheese a little.

If you're bowls aren't oven safe, you can use untoasted bread, sprinkle with cheese, and broil on a cookie sheet until bubbly, then transfer to the bowls. (This method is what's pictured above.)