Thursday, September 29, 2011

Beer 101 & Breckenridge Vanilla Porter

My mother-in-law is a badass. She taught me the right way to pour a beer way before I married her son. She also taught her daughter's girl scout troop how to pour one. In fact, everyone I know from St. Louis knows how to pour a beer. It must be something about growing up with so many local breweries, the culture is bred right into them. Anyhow, if you don't know how it's two easy steps. 

Pour along the side of the glass. Then, shift the stream of beer to the center of the glass, moving your hand further away from the glass if you want the pour to have a bigger head (the foamy part). 
The beer we're pouring here is Breckenridge Brewery's Vanilla Porter and it is tasty! I've been thinking about the rating system I'm going to use for this series of beer reviews and my thought was that a 100 point system is a bit overly complex. Can you tell the difference between a beer that scores 87 and 91? Probably not. Are they both going be good beers? Probably. So I'm opting for a 5 star system with the following legend:

*(1 star) Swill! I would only drink this if my mouth was on fire and it was the only thing around. A beer is going to have to be pretty skunky to get this rating.

**(2 stars) Meh. Two star beers are from the land of blah. You forget about them. You might drink them if they're free at a party or you might decide they're a waste of calories and go on a beer run for something better. Lots of grocery store beers would probably get this rating.

***(3 stars) Good. This is a beer you would order at a bar with a limited selection. It's not your favorite, but it's a solid option. This is not a beer you would purchase on a regular basis.

****(4 stars) Very good. These beers not only have a good flavor, but they have other things going for them like good mouthfeel or a great aroma. These are the type of beers you want to purchase on a regular basis.

*****(5 stars) Excellent. This category is reserved for beers that bowl you over with their awesomeness. You would fight city traffic to go to 'the good liquor store' that carries this beer. You would be proud to give these as presents to your beer snob friends.  No matter how many you've had already, you won't leave any in the glass because the beer is that excellent.

Based on this scale, I give this porter 4 stars.

The malts pretty much take over the flavor in this beer as with most porters. It has caramel and vanilla notes and the aftertaste is bready. This beer tasted better and better as it approached room temperature.

It smells sweeter than it actually tastes and pours with a nice big creamy head that diminishes and leaves some lacing on the glass.

You can see the color better in the next photo, which is like red root beer.

Nerdy beer fact to impress your friends with: porters get their name from the British street and river porters they were popular with during the 18th century. A 'stout' is actually a strong porter.

For those new to the world of beer drinking I thought I would give a very brief rundown of the different elements that go into a beer so you can start to identify what flavors you like. Beers range tremendously in flavor. They can be sweet, bitter, tart, boozy or light, smoky, floral, highly carbonated or almost flat.

The basic ingredients of beer are water, malts, yeast, and hops.

Malts are really the starch that ferments in the beer. This is usually malted barley or a combination of malted grains that could include wheat, rice, rye, corn, and sorghum. The roasting time and temperature of the malt is what determines the color of the beer. Beers with strong malt flavors might taste like dark fruit, roasted, caramelly, chocolatey, nutty, or bready.

Hops are actually the flowers of the hop vine and they are added for flavor, because they favor the growth of the yeast, and as a preservative. Hops impart a lot of the floral, herbal, and citrus flavors in beer.

Yeast is the fermentation agent. It also affects the flavor and may add a floral, fruity, or sour/tart taste.

So take note the next time you drink a beer you like!

Saturday, September 24, 2011

A Chocolate Chip Cookie Obsession

So I had a beer review all lined up for today and then I had an epic craving for chocolate chip cookies. Don't worry the beer review will make an appearance later in the week. But right now, let's talk about chocolate chip cookies!

So before I became more careful about what ingredients I use, my favorite chocolate chip cookie recipe used pudding mix. Yes that's right, pudding mix, usually sugar-free Jello brand vanilla. The pudding mix somehow helps the cookies stay chewy and get just the right consistency like bakery cookies. But have you ever looked at what's in pudding mix? Preservatives, added salt, maltodextrin (a bulking agent often used to pad out artificial sweeteners like sucralose). Don't get me wrong, there's something to be said for the convenience of instant pudding, but if I'm going to invest the calories in a chocolate chip cookie, I want it to taste of butter and chocolate, not maltodextrin.

So I tried Alton Brown's notorious chocolate chip cookie recipe that uses bread flour. I had high hopes, the cookie dough was the best I'd ever tasted. I followed the directions exactly. I even went all OCD and whipped out my food scale to weigh the dough amounts for each cookie. I baked a small test batch and I was completely underwhelmed. The cookies didn't spread enough and they came out cakey! I am thoroughly in the chewy cookie camp. I like my cookies chewy in the center with a crisp golden brown edge. No brownie-like hockey puck cookies for me!


And then I remembered a New York Times article that I'd read a few years back that said the best chocolate chip cookies are aged more than a day. I also read several other highly rated cookie recipes and noticed that the ones that claimed to be chewy or bakery-style use a slightly lower than average baking temperature. And so for two days I became a woman obsessed. I tried different baking temps, dough shapes, dough amounts, cookie sheets, and smacking the cookie sheet after baking (supposedly to help kill any poofiness-complete b.s. I might add) all using Alton's dough. And I made several important discoveries.

The Discoveries

1. Aged cookies taste more complex, brown more evenly, and have a better crackly texture on top due  to the dough being more dried out. I think a 24-36 hour resting time is good (by 36 hours the edges of my dough had started to absorb some fridge food odors-not good).

2. For chewy cookies, a lower oven temperature is better. My final product is baked at 325.

3. Dough shape matters. My husband and I preferred the dough rolled into balls. Because of the way the ball shape 'melts' you get a thicker chewy center, and a crisp edge. If you want a more uniform thickness with chewier edges use a flatter hockey-puck shape.
 
4. Cookie sheets matter. My insulated cookie sheets produced the chewiest, non-cakey cookies.

5. Dough size matters. We liked the 1.5 ounce cookie. It's a good size with a good crispy edge to chewy center ratio. If you like even chewier, you can safely go up to 2 ounces, maybe more.

The Unknowns

1. Bread Flour vs. All-Purpose. I am not totally convinced the bread flour made a noticeable impact. Further experimentation needed! (My husband has already volunteered as the guinea pig.)

2. Butter: To Melt or Cream. I am also not convinced this makes a difference. Next time I want to try browning the melted butter to see if you get an even more complex cookie flavor.


These cookies stay chewy too. The whole 4 cookies that made it to day 2, were still moist and chewy!

Katelyn's Favorite Chocolate Chip Cookie
Yields approx. 2 dozen cookies
adapted from Alton Brown's recipe

Ingredients

8 ounces (2 sticks) unsalted butter
12 ounces (approx. 2 1/4 cups) bread flour
1 teaspoon salt
1 teaspoon baking soda
2 ounces (approx. 1/4 cup) granulated sugar
8 ounces (approx. 1 1/4 cups) brown sugar
1 large egg
1 large egg yolk
1 ounce (approx. 2 tablespoons) whole milk (I used a mix of cream and water since I hardly ever buy milk)
1 1/2 teaspoons vanilla extract
12 ounces (approx. 2 cups) semisweet chocolate chips

Directions

1. Melt the butter in a saucepan and set aside.

2. Whisk together the flour, baking soda, and salt and pour it into a flour sifter.

3. In a large bowl, combine the melted butter and sugars and stir till well combined. Mix in the egg, yolk, milk and vanilla and stir until well combined.

4. Sift in the flour a little at a time and continue to stir. Once the flour is all added, stir in the chocolate chips.

5. Refrigerate the dough for 24-36 hours. (If you want to make them sooner, refrigerate at least an hour.)

6. Line two insulated cookie sheets with parchment paper or cookie mats. Measure the dough into 1.5 ounce portions and roll them into balls. Bake at 325 degrees for 15 minutes with 6 cookies to a sheet. Half way through the baking time swap the positions of the two cookie sheets so the cookies bake evenly. Cool on cookie sheets for at least 2 minutes before removing or inhaling. Make sure to let your cookie sheets cool down before doing the second batch (you could run cool water over the backs of the sheets to cool them faster.)

Monday, September 19, 2011

Salted Caramel Brownies

All the 'caramel' and 'brownies' I've had up until now have been imposters. No seriously, box mix brownies can taste pretty awesome, but if that's a brownie, these are a whole new category unto themselves. Fudgy. Salty. Sweet. Caramelly decadence.

Have you ever had a Werther's Original caramel? What about really good homemade fudge? Ok, if you liquified a whole mess of Werther's and made them salty and then swirled them into fudge, that would somewhat approximate what these taste like. Bonus: the salted caramel recipe makes more than you need for the brownies so you can drizzle more over the finished brownies or ice cream or just eat it with a spoon (not that I did that or anything).

This amazingness comes at a price. You are going to have to whip out a double boiler (or use your microwave in small increments). The caramel has to set up for 10 minutes before you can use it.  Every bowl and pan in your kitchen is going to get dirty. And unless you want brownie goo, you're going to have to let the brownies cool for about an hour before inhaling them. That being said, they are completely worth it. Let me make a couple of suggestions before you go rushing out to the store for ingredients. Make the caramel the day before (it stays good for about 2 weeks). If you're cooking for a family (maybe even if you're not) make a double batch of the caramel. Trust me. Everything is better with salted caramel.     

4 simple ingredients make up the salted caramel. Just make sure your butter and cream are at room temperature.


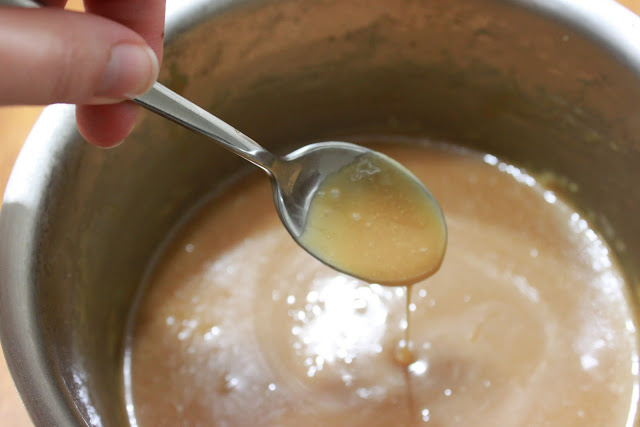
To make the caramel you caramelize the sugar, whisk in the salt, then butter. Then you remove it from the heat and whisk in the cream. I had to return mine to low heat to scrape down the pan a little more and get rid of some of the lumps of caramelized sugar.


To make the brownies you should prep your pan with greased overlapping foil or parchment paper like this:


The batter has just under a half pound of chocolate. I used chocolate drops that my dear friend Samantha brought me from The Netherlands as well as some Lindt 90% cacao. Behold! Copious amounts of chocolate!


Then you melt the chocolate and butter in a double boiler (or you could microwave in small increments-say 20 seconds-and stir until they melt). You can make a double boiler with a metal mixing bowl like so:


Then you get everything mixed up. Once your batter is ready to go you pour half the batter into the prepped pan, then put 9 dollops of caramel on top.

Then the other half of the batter and 9 more dollops of caramel. Then you drag a knife through the batter to swirl. Only do THREE or FOUR swipes with the knife. Being the artsy girl that I am I just couldn't leave well enough alone and I over-swirled. So a lot of my caramel dissolved into the batter. Less is definitely more with the swirling.
Then you bake it up and if you're like me you won't believe that these brownies are done because they are just still so gooey. Believe it! They set up quite a bit while they cool so don't add any extra baking time.


Let them cool for at least an hour before cutting into 16 squares. You'll notice that a couple brownies mysteriously disappeared during the cutting phase:


Salted Caramel Brownies
Yields 16 brownies
(adapted from Brown-Eyed Baker, who adapted it from Baking Illustrated)

Ingredients

7 ounces semisweet or bittersweet chocolate, chopped (the higher the percentage of cacao the more chocolatey these are gonna taste)
8 tablespoons (1 stick) unsalted butter, cut into quarters
3 tablespoons cocoa powder
3 eggs
1¼ cups granulated sugar
2 teaspoons vanilla extract
½ teaspoon salt
1 cup all-purpose flour
Salted Caramel Sauce (recipe follows)
Sea salt, finely ground (I ground up coarse sea salt in my mortar)

Directions

1. Prep an 8 by 8 inch pan with greased overlapping foil or parchment. Preheat your oven to 350 degrees.

2. Melt the chocolate and butter in a double boiler (or the microwave) until incorporated, then whisk in the cocoa powder.

3. In another bowl, whisk together everything EXCEPT the chocolate mixture, caramel, and flour. Then stir in the chocolate mixture. Then stir in the flour until just combined.

4. Spread half the batter into the prepared pan. Add 9 dollops of caramel. Then gently spread the other half of the batter over the top. Then add 9 more dollops of caramel and swirl with a knife with 3 or 4 passes max. Sprinkle a little sea salt over the top.

5. Bake for 35 to 40 minutes. Let cool in pan at least an hour or until caramel is mostly set. Then use the foil or parchment as handles to remove from pan. 


Salted Caramel

Ingredients

1 cup granulated sugar
6 tablespoons unsalted butter, at room temperature
1 teaspoon fine sea salt
2/3 cup heavy cream, at room temperature

Directions

1. In a saucepan over medium-high heat whisk the sugar until it caramelizes.

2. Whisk in the salt.

3. Whisk in the butter, scrape the sides and bottom of the pan, and continue to whisk until the mixture is smooth.

4. Remove from heat and gradually add the cream while continuing to whisk. You can return to low-medium heat for a few minutes if your mixture is lumpy. Remove from heat and allow to set up at least 10 minutes before using. Left over caramel should be stored in the fridge.

Thursday, September 15, 2011

Corn & Cheddar Pancakes

I made 2 versions of these pancakes. In the first version I followed Closet Cooking's recipe to the letter and while they were certainly good, they were not my cup of tea. They had a flavor similar to corn tortillas and the cornmeal made them a bit gritty. I should warn you, I'm picky about corn products. I love fresh corn, but detest most canned versions (bleck-added sugar, weird creaminess). I like grits, but only if they're the real kind (boo instant grits!). And I have only met a few good corn tortillas in my time. However, if you're all over the corn tortilla thing, you should definitely try the original version.

In the second version, I cut out the cornmeal all together and I sub powdered buttermilk for the milk for a more traditional pancake flavor. I did miss the more vivid corn flavor so I think next time I might try just 2-4 tablespoons of cornmeal (instead of the 1/2 cup originally called for). The best change I made was to the cheese. The original has you add 1/2 a cup shredded and as a result the cheese just kind of melts in and only makes a slight impact. But, if you cut the cheese into small cubes you get gooey little pockets of cheese in your pancakes that are soooo good. If the cheese touches the skillet you get crispy parts similar to the edge of a quesadilla. Nom!

A pancake's best friends: corn and white cheddar.

These can be eaten sweet or savory. They're good with butter and maple syrup or with salsa and sour cream.  If you're using a salty cheese I would skip the salt in the recipe all together. I should also warn you that I had a near fail because my batter was too thick. You want a consistency like melted ice cream, not like mousse. The first couple I made were overdone on the outside, gummy on the inside, and way too dense. Add a little liquid and thin the batter if necessary.

Bad! Batter that is way too thick!


Good! Batter with the right consistency.


Almost ready to flip. See the little air bubbles in the bottom left of the pancake. As they get bigger and more numerous you'll know it's time to flip. You can sorta test the solidness of the cake with the edge of your spatula to make sure. I cooked mine at 4 (one setting below medium on my stove) in a cast iron pan and they took 2 minutes on the first side and 1 on the other. Make sure to respray with cooking spray between batches. You can keep the done ones warm in a 250 degree oven.


Mmmm. Leaning tower of pancakes.

Corn  & Cheddar Pancakes
makes approx. 6-8 6" pancakes (the ones in my pics are smaller)
(adapted from Closet Cooking's Recipe)


Ingredients

1 1/4 cups flour or sub cornmeal for some of the flour up to 1/2 cup (I think 2-4 tablespoons would be the sweet spot for me)
1 teaspoon baking powder
1/2 teaspoon baking soda
1 Tablespoon sugar
1/4 teaspoon salt (skip this if you're using a saltier cheese)
1 cup milk or buttermilk
2 eggs
kernels from one ear corn (approx. 3/4 cup-I nuked the corn in a bowl with a little water to make it easier to get the kernels off)
2-3 ounces cheddar cheese, cut in small chunks

Directions

1. Mix all the dry ingredients except the corn and cheddar in one bowl. Beat the eggs together with the milk in another bowl. Stir the wet into the dry until just combined. Check the consistency of the batter and add more liquid to thin if necessary.

2. Stir in the corn and cheddar and let the batter rest for 5 minutes or so. While the batter is resting heat a skillet to medium heat.

3. Once the skillet is hot, spray with cooking spray and spoon 1/4 cupfuls of batter into skillet (or less if you want smaller cakes). Cook approx. 2-3 minutes, flip and cook 1-2 minutes more. Respray skillet before spooning in a new batch. Keep pancakes warm in a 250 degree oven if necessary.

Sunday, September 11, 2011

Beer (& Wine) Heaven

Yesterday while running some errands, my husband and I went into the Perimeter location of Total Wine & More on a whim. We'd never been in one before because even though we like wine, we're primarily beer drinkers. I can't believe I have never been here before! It is a warehouse-sized paradise of alcoholic delights. They have over 2,500 microbrews and imports! TWENTY FIVE HUNDRED! We restrained ourselves and came out with the following selection:

This place has locations in parts of the Southeast and Southwest. Some carry liquor as well as beer and wine and the prices seem really reasonable. I glanced through their tome of a price list and it has some great higher end spirits, including a single malt scotch my husband has had a hard time finding.

I love beer culture. I find it more accessible than wine culture. And there are so many great breweries right here in the states and Canada, so you don't have to pay an arm and a leg for a good beer. The most expensive thing we bought was a 750 mL Belgian import (the McChouffe), which was $10. It also doesn't hurt that there are lots of great pubs in Atlanta and I am spitting distance from my favorite, the Brick Store, which has two separate bars with lots of great beer on tap. (If you ever visit Atlanta, you have to go here.)

In the spirit of furthering my beer knowledge, I thought I might make a series of posts, each one featuring a certain beer and some info on that type of beer style. I might even expand this to other alcoholic beverages. I think this would be great for my own reference. I wish that when I used to drink more frequently that I had a guide. I was always bewildered by huge selections at bars and way too often ordered something syrupy sweet that I hated.

For the posts, I'm imagining pictures of a specific beer with a flavor description and some info about the style of beer. What do you all think? Would you like to see a recurring feature about beer (and possibly other alcoholic beverages)? Or do sites like Beer Advocate and Rate Beer have you covered?

Friday, September 9, 2011

Salmon in Packets with Zucchini Succotash

This is the type of dish that you could impress future in-laws with. It says "I'm sophisticated and enjoy my vegetables." And it's ridiculously simple to prepare. Plus calling the veggies a succotash sounds way more appetizing than 'vegetable medley', which pretty much sounds like you rummaged around in your crisper for odds and ends.  Lots of different fish would work too, not just salmon. And you could use whatever vegetables you want, I would just make sure to include some corn. Yellow squash, onions, and corn would be really good.  The flavor of the marinade is garlicky and similar to Italian seasoning, without totally overpowering the fish.  Next time I think I'll cut back the basil and add some lemon zest since I prefer a more lemony flavor.
The basic procedure is you marinate the fish for about an hour in the fridge and then bake them in the packets. While the fish is baking you pan fry the veggies. You could use butter for the veggies, but I wanted to take the flavor up a notch and I used bacon grease. I just fried a strip of thick cut bacon and then cooked the veggies in the drippings. There's no bacon in the photo because my husband pounced on it as soon as it came out of the pan. 

I don't have a bunch of photos either because this dish cools off quickly and I wanted to eat while it was hot! If you are cooking for a group, I would leave the salmon in the oven and just turn the heat down to 250 degrees if you need to keep it warm for a little while. The packets will keep the fish from drying out too much.

Just a side note. I cut all my vegetables with this mandoline slicer. It is one of the most used gadgets in my kitchen. It slices, dices, and makes matchsticks and it has a couple of size settings for each option.  It will take your fingertips off if you don't use the safety holder though. I use it to make hash browns, latkes, eggplant lasagna, and pretty much any dish that involves a substantial amount of vegetable cutting. 

Salmon in Packets
Serves 2 (recipe can easily be halved, doubled, or tripled)
(Adapted from ngibsonn's recipe)

6 tablespoons olive oil
1 tablespoon lemon juice
1 teaspoon dried basil (I thought the basil was a little overpowering, I think I will cut it back to 1/2 teaspoon next time)
1 teaspoon fresh ground pepper
1/2 teaspoon salt
1 tablespoon chopped fresh parsley (or 1 teaspoon dried-I used dried)
2-4 cloves garlic, minced (I used 4 since mine were on the small side)
2 6-8 oz. salmon fillets


1. Whisk everything together except the salmon.

2. Tear off two sheets of foil big enough to fully enclose each fillet. Spray one side of the foil with cooking spray.  Put the fillets on the foil (skin side down if they have skin)  and turn the foil edges up so it will contain the marinade.

3. Pour 1/2 the marinade over each fillet and fold two opposite sides of the foil over the fish so there is a seam running the length of the fillet. Crimp and roll the other two sides up. Place in an oven safe dish and let them marinate for about an hour in the fridge.

4. Bake at 375 degrees for 35-45 minutes. You'll know the fish is done when it flakes easily with  a fork. Drain the olive oil out of the packets and serve with lemon slices.

Zucchini Succotash
Serves 2

1 medium zucchini, sliced
1 carrot, sliced
1 ear of corn
1 slice bacon, thick cut (or 2 regular)
salt and pepper, to taste

1. Microwave the corn in a bowl with a little water for a couple of minutes to make it easier to cut off the kernels. Stand it on one end and run a sharp knife as close to the cob as possible to remove the kernels.

2. Fry the bacon until crispy and remove from pan.

3. Saute the vegetables in the same pan until they are al dente (in other words they should just start to soften and be flexible, but not mushy).  Add salt and pepper and serve with bacon crumbled over the top if it hasn't already been eaten.

Monday, September 5, 2011

Maple Oat Scones with Pecan Crumb Topping

I've been on a scone jag recently. And this recipe is my new favorite. These scones taste like you magically transformed a stack of pancakes with maple syrup and toasted pecans into a scone. This is because I used a slightly obscene amount of maple extract: 2 1/2  tablespoons total. I am placing an Amazon order soon just for a good extract for these scones. They're so crumbly and comforting and perfect with coffee or tea. They are also pretty forgiving in terms of substitutions. In this recipe you could use whole oats or oat flour or maybe even leftover oatmeal. You could use whatever type of nut you prefer. Next time I'm gonna sub buttermilk for the cream for an even more pancake-y flavor. The possibilities are endless.

To make the dough you mix all your dry ingredients together in one bowl and all your wet ingredients together in another bowl. 
Then you cut the butter into the dry mixture. A pastry blender is super handy for this:
Then you stir the wet ingredients into the dry ingredients and stir until the dough just forms. Turn the dough onto a floured surface and mold it into a circle about 8-10" wide:


Then you cut the dough into 8 pieces like a pizza and add the topping and put the scones on a greased cookie sheet:

Getting the topping on is actually the hardest part of this recipe. It's gonna look like way too much, but because the tops of the scones expand quite a bit it's not. Make sure you put the crumble topping on before you transfer them to the baking sheet and pick up any stray clumps of sugar that fall off otherwise you'll end up with burnt topping all over your baking sheet (I speak from experience here). Bake them at 425 degrees for about 12-15 minutes. And voila! The perfect sidekick to a cup of coffee/breakfast treat/afternoon snack/dessert:


Maple Oat Scones with Pecan Crumb Topping
Yields 8 scones
(Adapted from Charmie777"s Recipe)

Ingredients

For the Dough:

1 1/2 cups flour
1 cup oats
2 tablespoons sugar
1 tablespoon baking powder
1/2 teaspoon salt
2 1/2 tablespoons butter
1 egg
1/2 cup half and half or cream (you could probably safely sub whole milk or buttermilk too)
2 tablespoons maple extract
2 tablespoons pure maple syrup (if you don't have honest to goodness pure maple syrup, just sub 2 more tablespoons of sugar)

For the Topping:

1/4 cup packed brown sugar
1 tablespoon flour
1/2 tablespoon maple extract
1 tablespoon butter
1/2 cup chopped pecans

Directions:

1. In a bowl, make the topping. Stir the brown sugar, extract, and flour together. Cut in the butter and then stir in the nuts.

2. For the dough, mix all the dry ingredients except the butter in one bowl. In another bowl mix together all the wet ingredients.

3. Cut the butter into the dry mixture and then mix the wet ingredients into the dry until a dough just forms.

4. Turn the dough out onto a floured surface and mold into an 8-10 inch circle. Cut into 8 pieces and press the topping over the tops of the scones.

5. Transfer the scones to a greased baking sheet and bake at 425 degrees for 12-15 minutes or until light brown.

Saturday, September 3, 2011

Pesticide Residue: Food for Thought


Apples are #1 on the 2011 "Dirty Dozen"
I just recently became curious about organically grown food. I am not the type of person that does things simply because they are trendy or fashionable. If I'm going to spend more on my food, I want to know that it's actually worth more. What I found is that organic food is worth every penny and then some. There's a bunch of reasons I switched to organically grown food, but one of the most troubling issues is pesticide residue.
 
Regular farms often use synthetic pesticides that are terrible for the people applying them, contaminate the soil and water, and often end up on your food. By contrast, synthetic pesticides are banned or strictly limited on organic farms.  Instead organic farmers often use natural pest control methods like predation. 

It doesn't look like there are any studies that show the health effects of prolonged exposure to low doses of pesticide from food. (Seriously, who would sign up for that study anyway?)  However, Wikipedia informed me that larger pesticide doses can cause everything from birth defects to cancer. The American Medical Association recommends you limit your exposure to pesticides.

In the US, the Environmental Protection Agency sets the 'tolerance' level for how much pesticide residue is allowable on food, however this legal tolerance level is not a safety level. The Environmental Working Group gives this great example of why these tolerances are not fit protection:
"We estimate that EPA's "safety" levels for 11 pesticides permitted on apples are too high. Theoretically, a 4-year-old boy who ate one large apple with the maximum permitted amount of just one of those 11 pesticides would exceed the daily safe intake of that pesticide. Kids who eat more than one apple a day and more fruits and vegetables will consume even greater amounts of pesticides. Those who live near farm fields or in homes where pesticides are used will pick up even more toxic chemicals. "
Fittingly, apples were #1 for pesticide contamination on the EWG's 2011 "Dirty Dozen". Even if you can't afford to buy all organic, the Dirty Dozen are the foods with the most pesticide residue, which the EWG suggests you buy organic. (Or you could substitute a cleaner conventional alternative.) They also publish the "Clean Fifteen", which are the 15 foods with the least pesticides out of all the ones they test. You can click here to see both lists and here to see some commonly asked questions about pesticide residue.

If you want to buy organic, but find your grocery store doesn't really have a great or affordable selection you could try a farmer's market. Farmer's markets are great because you often get to meet the people growing the food and ask questions. In many cases small farms grow food organically, they just lack the USDA's certification. You can also haggle to some extent, especially if your buying in bulk.